
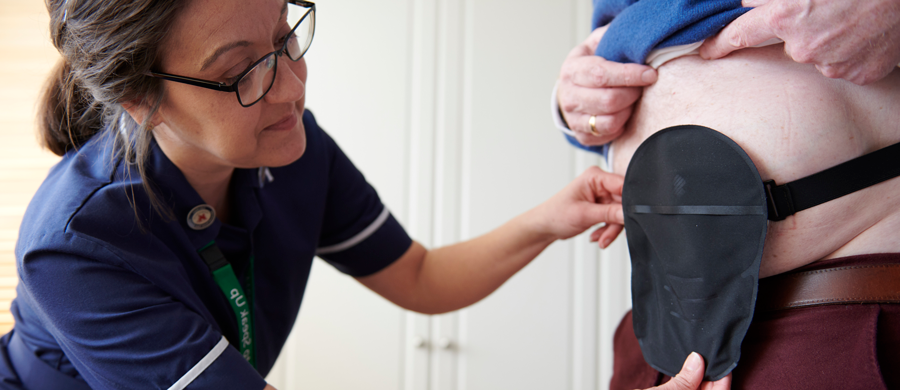
Stoma Pouch Change Checklist
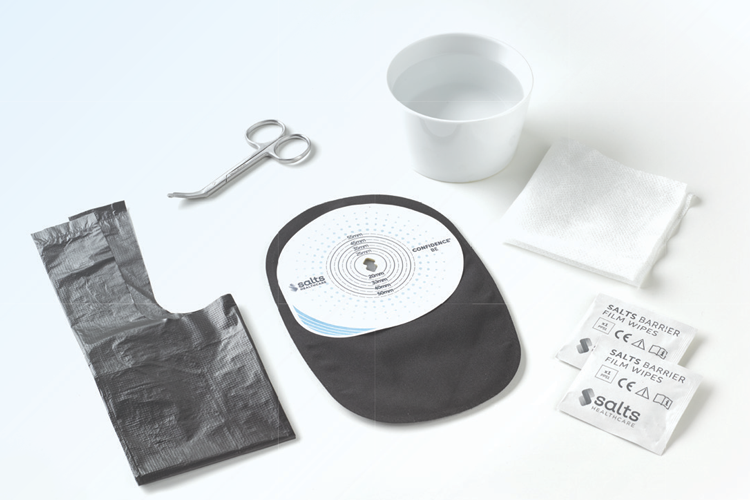
Ensure everything is readily available before changing the stoma pouch:
- A clean stoma pouch
- Scissors and template (if required)
- Dry wipes or plain kitchen roll (not cotton wool or tissues)
- Warm water
- Disposal sack
- Adhesive remover (if required)
Step-by-step guide on how to change a stoma pouch
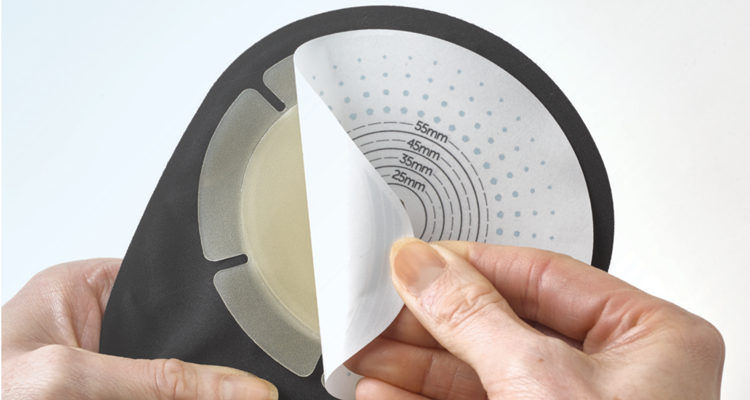
1. Draw the template of the stoma onto the adhesive of the pouch, then cut it out.
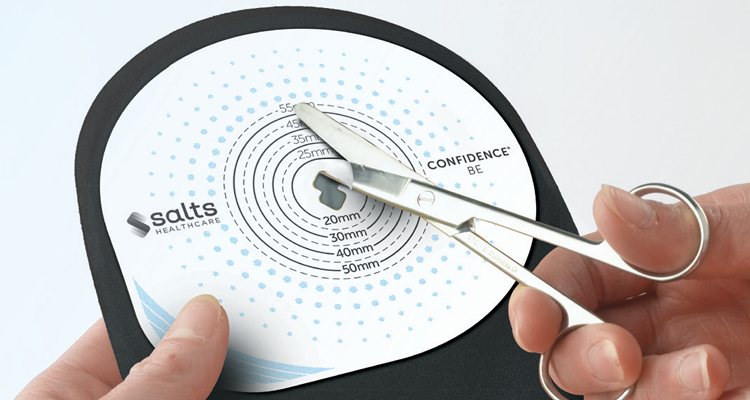
Tip: It is most important that this hole fits snugly around the stoma to prevent the risk of leakage and irritated skin. Your Stoma Care Nurse will show you how to do this and it will become easier.
However, it is possible for the stoma pouches to be cut to size once the initialinitial post-operative swelling has reduced.
Please note: If the person with a stoma has a drainable or urostomy pouch, it is important to empty it before starting the change procedure.
1a. Close the outlet of the new stoma pouch so it is ready to apply
1b. Drain the stoma pouch into the toilet
1c. To remove the stoma pouch carefully release the adhesive, working from the top down whilst supporting the skin. It is advisable for the patient to use an adhesive remover, when doing so spray a small amount as you peel away the adhesive to help with removal)
When empty, clean the outlet with toilet tissue or a dry wipe.
Roll the outlet back up to its original position and secure. Some stoma pouches allow you to tuck the outlet up into the bag for extra discretion.
2. Once removed, fold the adhesive section of the used pouch in half so it seals
3. Place the pouch into a disposal sack
4. Use dry wipes (kitchen roll is an alternative) and warm water to clean around the stoma.
Place these in the disposal sack (do not put them in the toilet as they may block it!)
Tip: Cleaning the stoma and skin, water is considered adequate and acceptable. However if your patient prefers to use soap, a simple non-perfumed, non-moisturised soap should be used.
Ensure that it is rinsed away before drying your skin to prevent irritation.
5. Ensure the skin around the colostomy/ileostomy/urostomy is dry
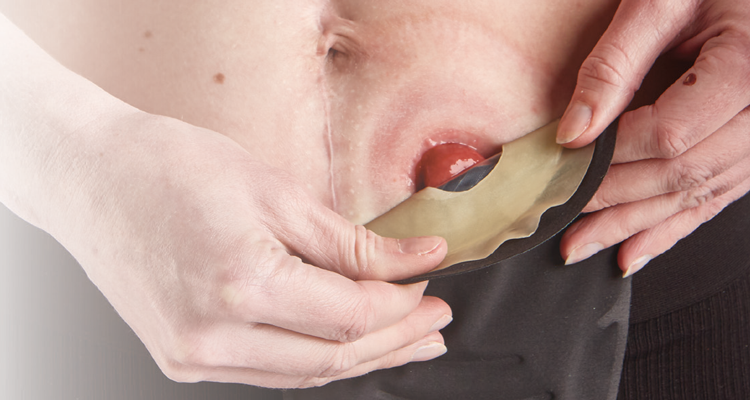
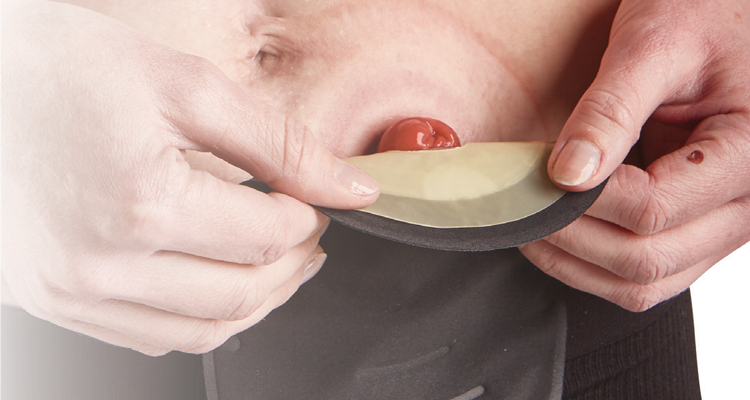
6. Remove the backing film from the adhesive of the new pouch
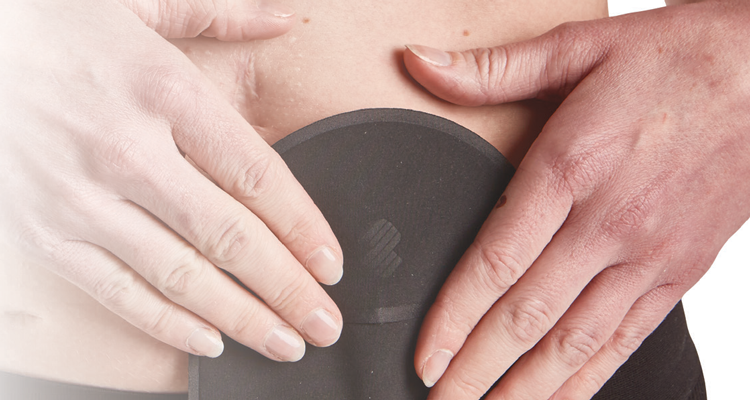
7. Fold the top half of the adhesive back, then position it around the stoma, working from the bottom and smoothing upwards with your fingers.
Take time to ensure there are no creases in the adhesive and use the warmth of your hands to mould the pouch to your skin, making sure it is well stuck!
8. Securely close the disposal sack and put in the normal household rubbish bin.
DO NOT flush a used pouch down the toilet, unless it is described as a “flushable” pouch, as it will cause a blockage